

Mastering the Bond: The Art of Gluing Latex Seams

Learn the professional techniques for creating flawless, durable latex seams through proper surface preparation and precise adhesive application.
The Alchemy of Latex: Why the Bond Matters
Making latex clothing is an exercise in chemical engineering rather than traditional tailoring. Because latex is a non-porous elastomer, conventional needles and thread would only perforate and weaken the material, creating "stress points" prone to tearing. Instead, construction relies on cold-welding: a chemical process that fuses two sheets of rubber into a single, seamless entity. To achieve that coveted, high-end, factory-grade finish, you must move beyond simple assembly and master the nuances of polymer bonding. This guide explores the precision required to transform raw rubber sheets into garments that are as durable as they are aesthetically flawless.

Tools for Glue
Some people use brushes, some spatulas and sponges. Finding the right tool for your work space is important. I use a combination of different tools cut to size.

Glue Spatulas : I like to use plastic glue spreaders and spatulas for applying glue to my latex seams. I cut the glue spreaders to various widths for different size seam allowances. Simply wipe with your cleaning chemical after use on tissue.
Brushes : Some people prefer silicone brushes or real hair brushes that you ca buy in different widths for your latex glue application

Sponges : if you have a large area to cover, applying glue with a spatula will leave lines. So, soak a sponge or sponge tip applicator brush in glue and rub over the prepared cleaned latex for a smooth application without glue lines. This is used when joining two large pieces of latex together. That is where you glue two latex sheet pieces together and use baking sheets between the layers to slowly smoothly join them together for a double colour or thicker latex piece to use. You secure the edges together at one end and lay the baking sheet between, with a heavy roller or even bottle with liquid in, slowly pull the baking sheet away as you roll the pieces together.
Sometimes you need to pull back the sheets for air bubbles but you can use a hypodermic needle to pull air pockets out after (not if inflatables though)

Flow thru bottle with brush tip: After ten years of dipping the glue spreader into the glue pot over and over again - dip dip dip, i finally found a much better applicator. This is the Flow thru bottle with a brush tip. You simply fill the 60ml bottle with glue, and the 7mm or 2mm brush tip can be screwd on to the bottle, the glue flows through the brush applyinh a smooth seam! No more dipping. They are fairly expensive but reusable. After use the bottle can be capped and sealed for the glue to be used another day. You simply flush the brush head with chemical cleaner, like heptane, and wipe the tip after use. Game changer. You can buy these from USA from Gaunt Industries or for a UK supplier Zoic Paleotech
Surface Preparation: The Foundation of Strength
The most frequent cause of premature seam failure—where edges peel or gap after only a few wears—is inadequate surface preparation. Latex is inherently sticky; to prevent it from self-adhering during storage and shipping, manufacturers coat it in silicone oil or talc. Even a microscopic trace of these release agents acts as a barrier that prevents the adhesive from penetrating the rubber.
Select the Correct Solvent: Use a high-quality solvent such as Heptane, naphtha, or specialised latex degreaser. Avoid hardware-store substitutes that may contain harsh additives, as these can degrade the rubber itself.
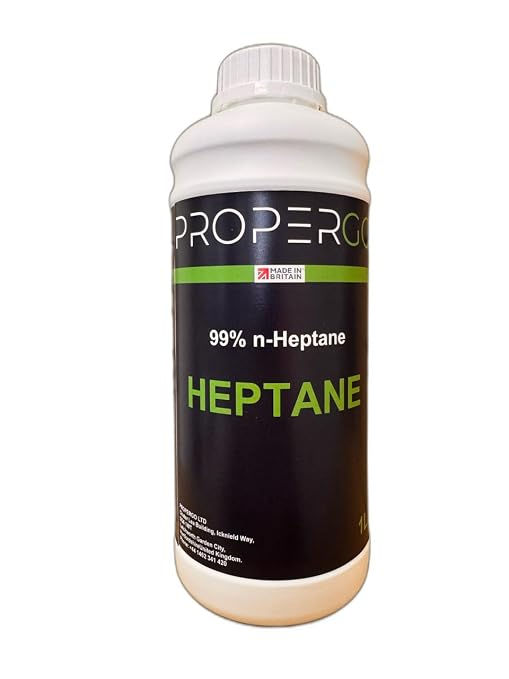
The 'Tacky' Test: Use a lint-free, kitchen roll, microfibre cloth. Wipe the edge of the latex repeatedly until the residue is gone. I use Isopropyl alcohol to clean the seam of dust and talc. You will know you have reached the correct level of cleanliness when the latex stops feeling slippery and begins to feel 'grabby' or resistant to your touch. (wash the latex with degreaser surfactant such as washing up liquid to remove silicone from surface if worn)
Protect the Field: Natural oils from your fingertips can contaminate the cleaned surface in seconds. Wear nitrile gloves during the preparation and assembly process to ensure the surface remains pristine.

Cling Film: I personally use brow lamination film in a dispenser box with a cutter costing less than £5 for the box and the film is super cheap on rolls. After the glue seam is semi dry, simply place the thin brow lamination film over the glue area which stops the air drying it out and gettting dust or talc over the glue. You simply peel back as your glue. Now you can just cut cling film to size but this is very tricky and frustrating. You can leave the covered glue seam til the next day even ! Lamination film is the best!!

Adhesive Application: Consistency is Key
For latex construction, contact cement Bostik 3851 (specifically formulated for rubber) is the industry standard. Unlike craft glues that dry by evaporation, contact cement functions through chemical activation. You will need to thin the glue using Heptane or their dedicated thinner by Bostik. You can purchase Bostik 3851 in 5 litre bulk or smaller quantities from Ebay 25ml, 125ml, 250ml and 500ml

Radical Rubber offers their version of Bostik glue (Link) as well as a white liquid latex style glue that some use for seams ( clean up with Naptha) however, I only use the White Radical Rubber Glue for preparing stabilising twill / fabric or zips. Some swear that this is the perfect glue for seams, but i am still using Bostik. I am yet to try their solvent based one but will update if it's better. Currently, the pricce for Radical Rubber Solvent and Bostik 3851 in 500ml is the same price.
The Thin-Film Rule: Apply a thin, uniform layer of adhesive to both seam surfaces (shiny and matte side) . If the glue is gloopy or thick, it will create unsightly ridges and thicken the seam, which is uncomfortable against the skin and creates a distracting line in the garment’s silhouette. Use thinner if too thick to dilute the glue for a syrup texture.
The Waiting Game: After applying the glue, you must wait for the solvent to evaporate until the surface loses its "wet" gloss and turns matte. If you join the surfaces while they are still wet, you trap the solvent, which will inevitably lead to bubbling and a compromised, "gummy" bond.
Drying Climate: Environmental factors matter. In high-humidity areas, drying takes longer. If the glue appears cloudy after it dries, it has likely been exposed to too much moisture; in such cases, it is safer to wipe it away and restart.

Achieving the Perfect Flat Seam
In latex work, alignment is unforgiving; once the two glued surfaces make contact, the bond is instantaneous . You need to use thinner on a brush or Heptane to release the bond. However, if the latex is old, the thinner can melt the latex so be sure to test on inconspicuous area first.
1. Work Surface: Use a rigid, non-porous surface like glass or a specialised self-healing cutting mat. If your surface is textured, those textures will transfer to your seam. Some use Brown paper they can throw away after gluing for clean workspace. I personally use glass cutting boards i clean after gluing with isopropyl alcohol.

2. Precision Alignment: Start by aligning the centre of your seam, then work outward toward the edges. Use small, controlled movements to prevent the rubber from stretching unevenly as you join the pieces, which would otherwise result in a wavy, rippled seam. Use a domed surface for curved seams. Using a smooth sweeping motion to join the seam together and not jerky pressing each inch at a time.
3. The Seam Roller:*This is the secret weapon of the professional. After joining the edges, pass a hard, narrow seam roller (often made of steel or dense plastic) firmly over the bond. The objective isn't to add more glue, but to exert mechanical pressure that forces the latex polymers together, expelling air pockets. A well-rolled seam should be virtually indistinguishable from the surrounding material.

Finishing Touches and Curing
The bond may feel secure immediately, but it is not yet at maximum strength.
The Curing Window: Allow the garment to sit undisturbed for at least 24 - 48 hours. During this time, the cross-linking of the adhesive and the rubber reaches its peak strength. Attempting to wear or stretch the garment too soon can cause the seams to fatigue.

Cleaning Residue: Once cured, any slight "halo" of dried glue along the edge can be cleaned away. Lightly dampen a cotton bud or kitchen roll with your thinner / Heptane solvent and gently buff the edge. Do not soak the seam, as this can weaken the bond you just worked so hard to create.
When performed correctly, the seam becomes the strongest part of the garment. If you were to tear the item, the material itself would likely fail before the seam ever separated.
*This guide was inspired by the detailed beginner tutorials and community insights found at [Textile Learner](https://textilelearner.net/how-to-make-latex-clothing-for-beginners/), a premier resource for specialized garment construction.*


Comments